Thursday, September 28, 2006
WSS Project: Bavarian Infantry Completed

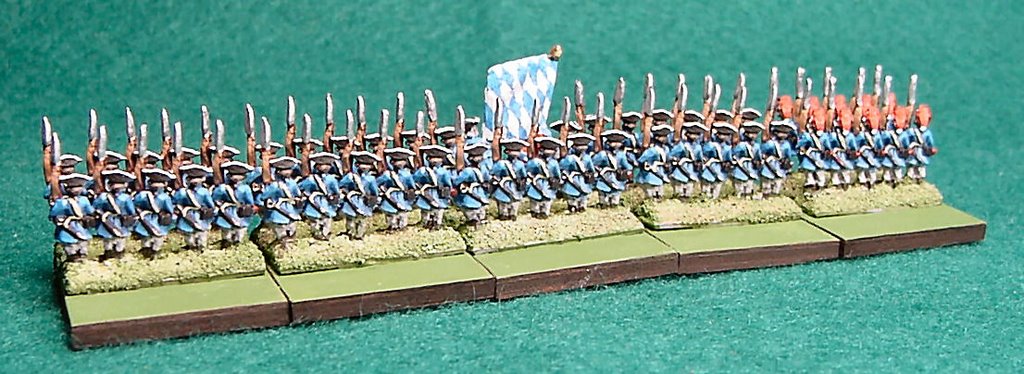 (Click on picture to see larger version in a new window)
Monday, September 25, 2006
Tools of the Trade
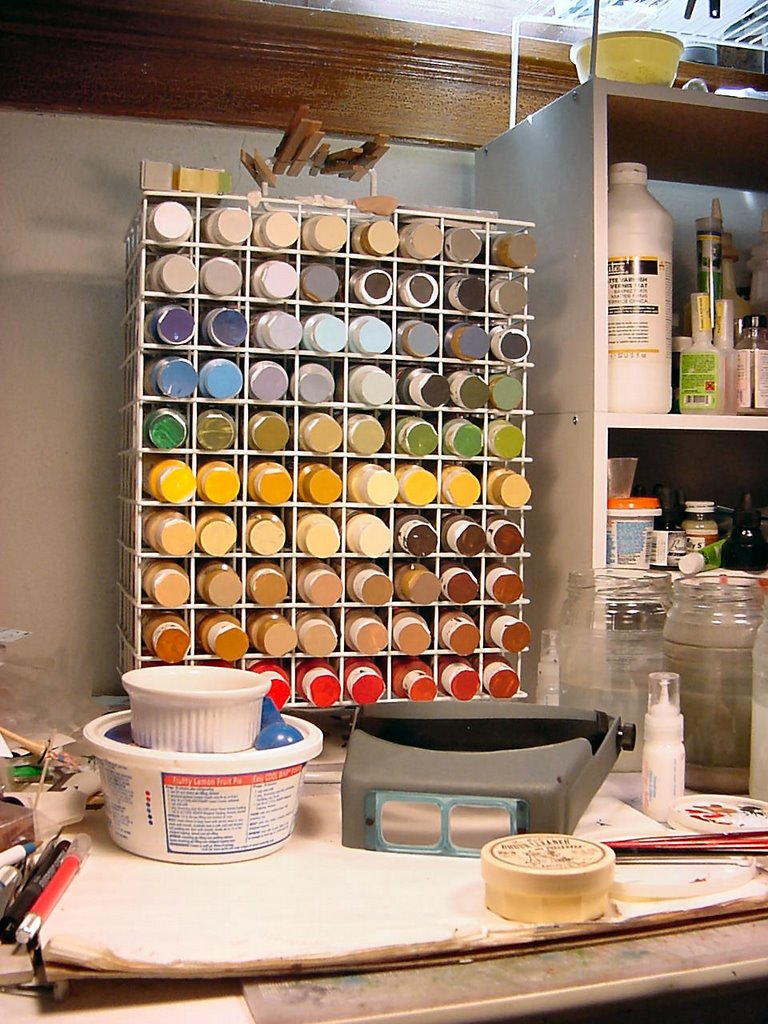 Here's a picture of a small — and somewhat tidy — section of my worktable showing my main tools for painting.
99.9% of the paint I use is of the "craft" acrylic variety and they all come in similarly shaped 2-ounce bottles. A couple years ago I bought one of these nifty rotating paint racks; each side holds 80 bottles and both sides of mine are fully stocked. The side showing in this picture is the side with the most frequently used colors and they're roughly organized into color groups.
I used to have the bottles stuck in the rack with the bottom of the bottle showing, but I decided to turn the bottles around and put samples of the paint right on their caps; this gives me a more accurate way of judging what the colors look like when they're dry. (Some of the bottles are a transparent but slightly milky-looking plastic that interferes with the true color of the paint and some of the colors dry a bit darker than they look when wet, so it's good to see the true appearance of the final color.)
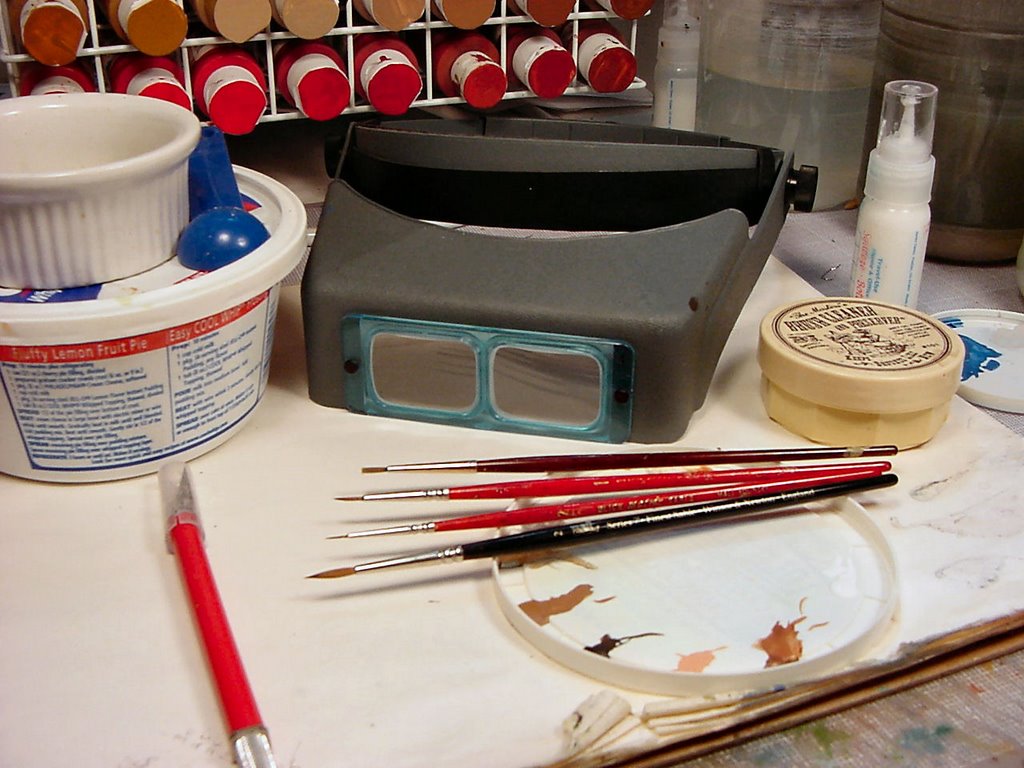 Here's a closer view of the main tools. Of all the things in this picture, the one item that's made the most difference in how I paint has to be the Optivisor: I honestly couldn't paint without it.
I had a less expensive magnifier, but it had plastic lenses and the headband was essentially just a springy clamp that hugged my head. It was adequate but I finally decided to upgrade to the Optivisor because the lense plates are high-quality optical glass and the headband is fully-adjustable and, therefore, more comfortable. Also, the cheaper one didn't have the eyeshade feature and it really makes quite a difference when you can work directly under the lights and not have the light shining down directly into your eyes (less eye fatigue.) I use a 2x lens plate; I originally bought a 2.5x (or was it a 3x?) plate but the working distance was just too close. (The 2x plate allows me to hold whatever I'm working on about a foot away from my face before it goes out of focus.)
In front of the visor, you can see a selection of brushes. The one in front is a #2 Winsor & Newton (excellent brushes); the two with the red handles are from Dick Blick Master Sable Series — #00 and #1 (also excellent quality bristles, but the handles aren't as durable). The last brush is a "beater" synthetic bristle item I use for spreading matte varnish for basing, occasional dry-brushing and it's also my "oops" brush that I keep nearby to correct any mistakes while the paint is still wet (I just make it moist and remove the problem paint); the stiffer bristles on this brush make it well-suited for these tasks.
The round container is The Masters Brush Cleaner and Preserver. It does a great job of removing built-up paint in the bristles near the ferrule and will even remove dried paint with some effort and patience. I use it regularly and it's really helped lengthen the life of many of my better brushes (I've had the same W&N and Blick brushes for 4 years or so and they're still going strong.
I use three different jars of water for cleaning my brushes. These are quart-sized glass pickle jars; one is for metallics, the second one is for first cleaning (or second cleaning of a brush used for metallics) and the third jar is the final rinse. Each jar is filled fairly full (the ones in the picture are in need of emptying and refilling) with tap water and a drop or two of Dawn dishsoap (washing up liquid for our UK friends.) The relatively large volume of water means I have to change it less often and it also allows me to give the brushes a really good swish without worrying about knocking over the jar. When I'm done painting, I usually put a spare plastic lid over each jar to keep the water from evaporating too quickly and to keep out various insects that seem attracted to them (spiders seem particularly prone to drowning in them for some reason.)
Speaking of plastic lids, I use white ones from containers of yogurt or cottage cheese as palettes. I particularly like the ones that have the little reinforcement ridges around the outer lip of the lid; these make very convenient wells for drops of paint and my ever-present "magic wash" mixture of Future acrylic floor finish and water. Once the palette is filled with dried paint, I take it and chuck it into a plastic bowl containing Simple Green cleaner and water and let it soak after snapping on the bowl's lid. When I start running out of lids, I take out the ones that were soaking and toss in the next batch. The ones that have soaked (often for days at a time) clean up with a quick rinse under warm tap water and a light scrubbing with an old toothbrush; after rinsing in clean water, I just blot them dry and they're ready to go again.
The small plastic squirt bottle behind the brush cleaner is something I picked up at a craft store. I keep a small quantity of Liquitex Matte Varnish in it and it's great for dispensing small amounts for basing and gluing (the varnish is an excellent adhesive, too.)
The plastic bowl and ramekin on the left of the picture hold my supply of beach sand. The ramekin holds the fine sand after sifting the stuff in the big bowl through an old tea strainer. This is what I use instead of flocking around the feet of the 10mm figures. The blue plastic measuring spoon is used for scooping the sifted sand and pouring it over the figures' bases after applying the adhesive; it helps me to get the sand where I want it without making a mess of things. (Pictures and description of this step will follow soon.)
Well, that's probably enough for today's posting; you can wake up now...
WSS Project: Bavarian Infantry in Progress
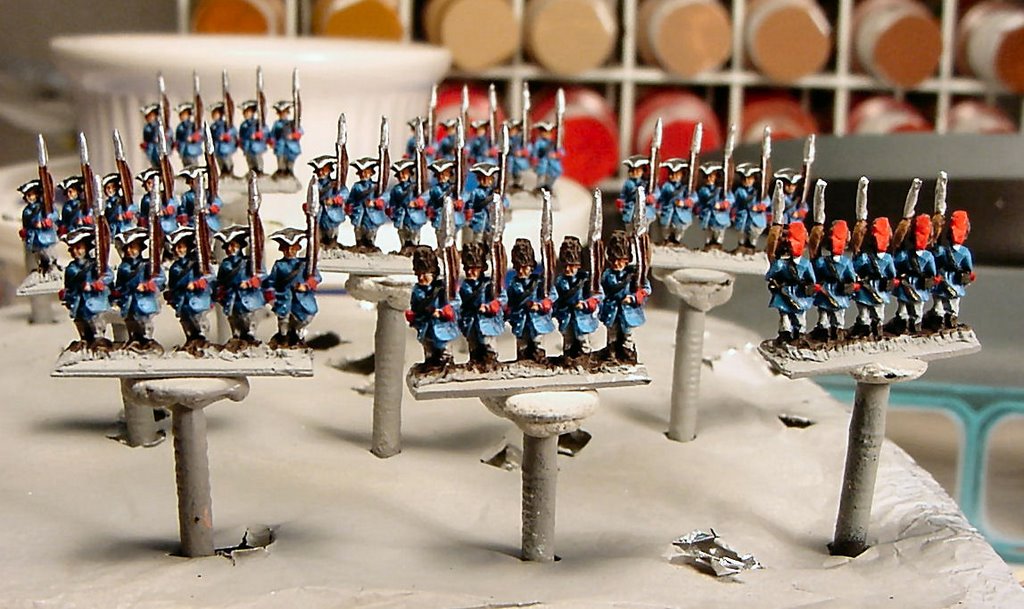 (Click on picture to view larger image in a new window)
- Carefully draw the lozenge pattern on both sides of the flag, then even more carefully paint the blue lozenges over a white field. (I could make the lozenges oversized to make drawing and painting them less tedious.)
- Make a color decal of the pattern and apply that instead of painting, or,
- Make a decal of just the lines of the pattern and then paint in the blue lozenges.
At this point, I'm leaning toward the first option listed as it might be the fastest. I do have decal paper in both clear and white, so I could use the clear sheet printed with blue lozenges and apply it over a white painted field, or I could go with the white sheet printed blue (not sure there's much of a difference one way or the other, really.) I've never used the decal paper in this manner so it might be an interesting experiment; I guess I'll have to ponder this for a while.
I did keep track of how long it took to paint the figures to the point you see in the picture and I was quite surprised that it took much longer than I originally thought. I thought the average time for the other infantry units was about 3 hours or a bit less, but my records for the Bavarians show that it took 4 hours and 15 minutes (and I was very careful to record my times.) As I said earlier, I still have the command strip to finish, but that's just the standard bearer, drummer and officer; the two musketeers on either end of the command strip are painted to the same point of completion as the rest of the soldiers. Once I settle on how I'm going to do the flag, I suspect I'll need the better part of an hour to finish those three figures as they each need different kinds of uniforms and those don't lend themselves to much of an assembly line process.
After the painting is all done, I'll finish the bases of the figures with my usual sand and paint method and I'll show some of that process, too.
Stay tuned for more...
![]()